Building a Low-Budget, DIY Water-Cooled PC
Starting Point
My first contact with water cooled computers was when I inherited an old GIGABYTE 3D Mercury tower. It was huge, cooled only the CPU + hard disks and incorporated some interesting design decisions (e.g. mixed metals, a tapering air duct, different tubing diameters, …). With time, the necessity for four 5.25" drive bays faded away and I wanted to get rid of this huge and heavy full tower. So I decided to rework my computer setup. Here, I will describe my journey to a water cooled setup with a wild mixture of components and some DIY-fiddling. The main focus was placed on functionality and not on appearance - so don’t be disappointed when looking at the images.
Intended Goal
The target setup should include a water cooled CPU + GPU and the whole system should fit in a smaller case. Also, the budget I am willing to spend on this project is limited and I want to reuse some of the old components (like the CPU cooling block or the water pump).
Step 1: Getting the GPU Water Cooled
First, I decided to get my graphics card water cooled. It is an GTX 970 (quite old, but still sufficient for the games I like to play). Luckily, there is a mounting kit by NZXT that also fits the GTX: Kraken G12. It is intended to be used as a bracket for AIO-coolers from NZXT. As my plan is to include the GPU in the existing cooling system, I rather thought of the bracket as a base to start with rather than to use it with an AIO. Next, I needed a cooling block. I skimmed eBay and stumbled across one that somewhat fitted my dimensions (one edge even already had been sawn off). I got it and basically just screwed it on top the NZXT bracket.
I initially had some issues with the distance between the GPU and the cooling block, but I was able to put some copper plates in between the GPU and the block. This isn’t perfect, but it works good enough. To address the increased heat in the system, I added two 140mm radiators to the system.
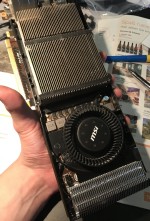 Disassembly of the GPU (NVIDIA GTX 970) |
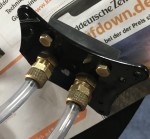 The cooling block I got from eBay |
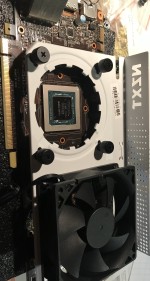 GPU mounting bracket “NZXT Kraken G12” |
Step 2: Moving to the Smaller Case
With the actual cooling being setup, only the transition to the smaller case was remaining.
When the new case arrived, I was quite shocked how small it was. It took some time to fiddle everything together. Most of the fiddling was related to connecting the tubes. I decided to stick with the old pump, as it still was working and is tolerably quiet. This brought some issues, because the old system had different diameters for the tubing, and I wanted to stick with 13’ diameter. But by using a hot air pistol to smoothen the plastic tubes, I was able to connect everything. To my surprise, it wasn’t even leaking 😅. The components were connected using 1/4" fittings and 13/10mm tubes. As I had no reservoir, I just bought a cheap plastic box in which I put some adapters from a web shop specialized on pneumatics.
One remaining task is to come up with a solution to actually include the water pump in the case. I probably need to attach the power supply unit to the back of the case to get enough space. Learning here: always measure components before ordering!
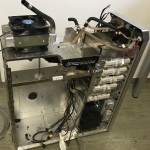 The old, stripped Gigabyte Mercury case |
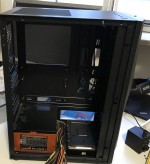 The new, quite small case |
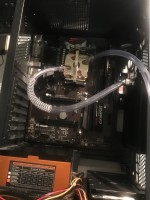 First try to fiddle everything together |
Conclusion
This setup is quite adventurous, but it was pretty cheap and now I have a compact, water cooled system. If you just want to decrease the temperature of your GPU, I would recommend to get a non-stock heat sink with a fan instead of going through this tedious process. But if you have lots of time, enjoy to fiddle around and come up with creative solutions to make incompatible components work together, I’d recommend to just go for it.
